This easy corn free tortilla recipe provides the flexible gluten-free tortillas you have been searching for. Add your favorite fillings to achieve a dairy-free, gluten-free option – suitable for those that also need to avoid corn. This simple recipe helps achieve as close to authentic Mexican tortillas as possible without the worry of allergies or intolerances.


I’ve been cooking gluten free recipes for my family for several years now. However, I recently offered to make a meal for a young family that required a gluten-free, dairy free and corn free diet. I knew it was likely the young children would enjoy adding their own selection of Mexican food options to cooked tortillas. They are easy to transport, easy to prepare, and any leftover tortillas can be made into gluten-free wraps for lunch the next day. Therefore, I decided I was onto a winner.
Homemade Tortillas is something I’ve gotten pretty good at – I must admit though, making them without masa harina or corn flour was not something I’d ever tried before. I soon discovered a lot of terrible recipes that either tasted yucky, got really stuck to the pan or were just so bad I wouldn’t even feed them to the chickens.
I’m pleased to share though that I persisted. And I’m now super pleased to present my Easy | Gluten Free | Dairy Free | Corn Free | Vegan | Tortilla Recipe for you to try and enjoy!
Why you’ll love this Corn Free Soft Tortilla Recipe
Simple Ingredients – Rice flour, tapioca starch, chickpea flour, psyllium husk, olive oil, salt and water
Perfect texture for folding – Suitable for gluten-free wraps, traditional tortillas, and soft tacos. Also great for burritos or enchiladas
Easy Recipe – use a tortilla press to quickly flatten the ball of dough. OR if you don’t have a tortilla press, I have a super simple tip to create the same outcome easily (see “How to make homemade tortillas without a tortilla press” – below)
Save for later use – place sheets of parchment paper (baking or wax paper) between each tortilla to ensure they do not stick to each other. Store inside an airtight container and keep at room temperature for 1-2 days, in the fridge for 2-3 days or frozen in a freezer bag for the next time you want homemade tortillas.
Ingredients to make Corn Free Tortillas:
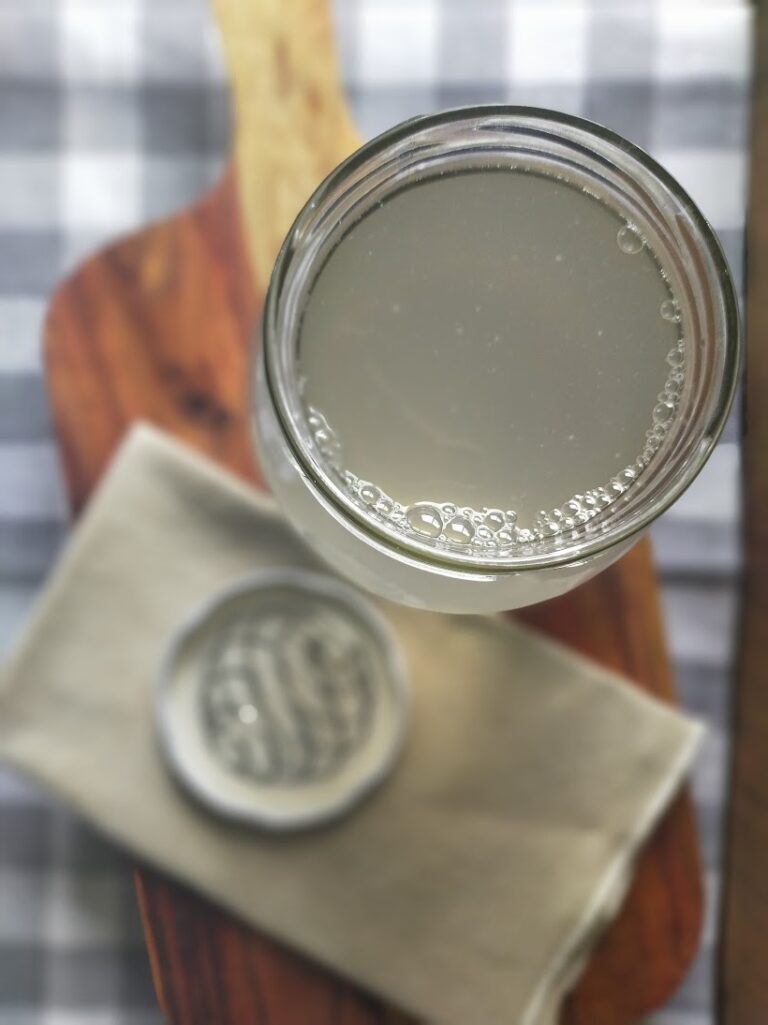
- 5 Tablespoons Psyllium Husk (not Psyllium Powder – the powder will dissolve rather than swell. Swelling is vital to the process!)
- 2 Cups Warm Water
- 1½ Cups Rice Flour (plus extra for rolling)
- 1 Cup Tapioca Starch (tapioca flour)
- ½ Cup Chickpea Flour
- 1 teaspoon Himalayan salt
- ¼ Cup Olive Oil (plus extra for frying)
Tools you will need to make this recipe
1 medium bowl, 1 large bowl, measuring cups, measuring spoons, rubber spatula, pastry brush for oil. A clean dry surface for kneading the dough. Clean tea towel. Pieces of parchment paper (baking or wax paper). A non-stick pan (I have had the best results with an electric, stainless steel fry pan. I have found a cast iron skillet doesn’t work well for this recipe.) A tortilla press, if you have one – but if not, a wooden chopping board and a rolling pin. * (See “How to make homemade tortillas without a tortilla press” – below).


How to make Corn Free Tortillas – Instructions
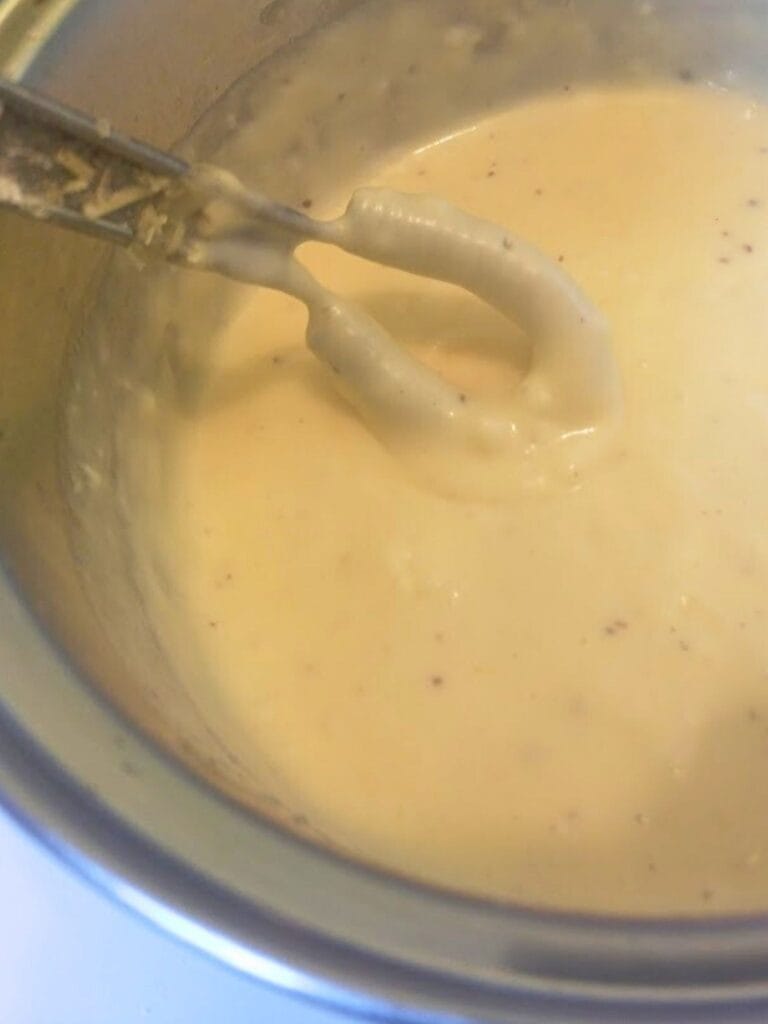
1. In the medium bowl measure out 5 tablespoons of psyllium husk. Stir in 2 cups of warm (not hot) water. Leave to stand for approximately one minute. After which a thick, slime like texture will occur.
2. While you wait, in the large bowl place, the remaining dry ingredients (rice flour, tapioca starch, chickpea flour, salt). Stir together gently until combined.
3. Make a well in the center of the dry ingredients, add the olive oil and psyllium mixture. Stir with a rubber spatula until the mixture starts to form a dough ball. This may take a few minutes as it will be very thick.
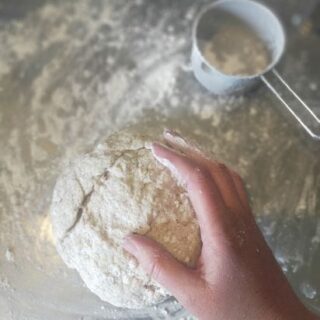
4. Once the dough is starting to pull away from the edge of the bowl squeeze the dough with your hand so it pushes through your fingers. Continue doing this until you have all the lumps worked out and have an evenly consistent, pliable dough.
5. Turn the tortilla dough out onto a clean surface that has been dusted with a little rice flour. Gently knead the dough until all the air bubbles are removed – but don’t overwork it. The dough will remain a little rough and may have a few cracks – this doesn’t matter!
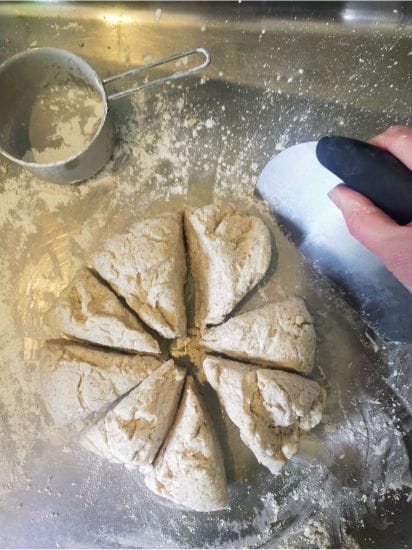
6. Cut the dough into even size pieces by cutting it in half, then in half again, and so on. You should get 8 pieces for large tortillas or 12 for smaller taco size portions. Gently roll each piece into a ball with your hands, place each ball back into the large bowl and cover with a tea towel to keep from drying out.
7. If you have a tortilla press, lightly dust both sides with a little rice flour, place one of the pieces into the center, press firmly. Afterward, gently remove and continue with the remaining sections. You can now jump to step 8 below.
If you don’t have a tortilla press follow the next instructions…
* How to make homemade tortillas without a tortilla press
- On a flat, dry surface place a sheet of parchment paper – lightly dust the paper with rice flour
- Put one tortilla dough ball on top of the paper – lightly dust the dough with rice flour
- Place a second sheet of parchment paper on top of the dough
- Using a large wooden chopping board or wooden serving platter – press down on the dough ball with all your weight. In essence, you and the wooden board, have now become the tortilla press.
- When you have it as flat as possible, remove the top layer of parchment paper. Dust the dough with a little more rice flour and return the paper on top.
- Now continue to flatten the dough with a rolling pin. Roll from the center out, turning the dough often to help keep the circular shape. Generally, 1-2mm thick is ideal.
- You are now ready to return to the recipe instructions and continue with step 8.
8. Heat your non-stick pan to medium heat. Using a pastry brush lightly brush on a small amount of olive oil to one side of the tortilla. Place it oil side down into the hot pan. Allow to cook until light brown spots appear on the underside and small air bubbles form on the upper side. Brush on a little more olive oil to the upper side, then flip it over to continue cooking. (I like to prepare the next dough ball while the first one is cooking.)
9. When each tortilla is cooked stack it on a plate or cooling rack. The best way to stop them sticking to each other is to place a piece of parchment paper between each. This also makes it easier to separate them should you choose to freeze them for later use.
Once finished add your favorite Mexican fillings for a delicious meal. Or allow the cooked tortillas to cool completely and store for future use as described in the ‘save for later’ section.
I certainly hope you enjoy making these gluten free, dairy free, corn free tortillas!! More gluten free and dairy free recipes are coming but for now please check out what else is on the blog.
Corn Free Tortillas * | Gluten Free | Dairy Free | Vegan
This easy corn free tortilla recipe provides the flexible gluten-free tortillas you have been searching for GF | DF | V
Perfect texture for folding into gluten-free wraps, traditional tortillas, and soft tacos. Also suitable for burritos or enchiladas
Ingredients
- 5 Tablespoons Psyllium Husk (not Psyllium Powder - the powder will dissolve rather than swell. Swelling is vital to the process!)
- 2 Cups Warm Water
- 1½ Cups Rice Flour (plus extra for rolling)
- 1 Cup Tapioca Starch (tapioca flour)
- ½ Cup Chickpea Flour
- 1 teaspoon Himalayan salt
- ¼ Cup Olive Oil (plus extra for frying)
Instructions
1. In the medium bowl measure out 5 tablespoons of psyllium husk. Stir in 2 cups of warm (not hot) water. Leave to stand for approximately one minute. After which a thick, slime like texture will occur.
2. While you wait, in the large bowl place, the remaining dry ingredients (rice flour, tapioca starch, chickpea flour, salt). Gently stir them together until they are combined.
3. Make a well in the center of the dry ingredients, add the olive oil and psyllium mixture. Stir with a rubber spatula until the mixture starts to form a dough ball. This may take a few minutes as it will be very thick.
4. Once the dough is starting to pull away from the edge of the bowl squeeze the dough with your hand so it pushes through your fingers. Continue doing this until you have all the lumps worked out and have an evenly consistent, pliable dough.
5. Turn the tortilla dough out onto a clean surface that has been dusted with a little rice flour. Gently knead the dough until all the air bubbles are removed - but don't overwork it. The dough will remain a little rough and may have a few cracks - this doesn't matter!
6. Cut the dough into even size pieces by cutting it in half, then in half again, and so on. You should get 8 pieces for large tortillas or 12 for smaller taco size portions. Gently roll each piece into a ball with your hands, place each ball back into the large bowl and cover with a tea towel to keep from drying out.
7. If you have a tortilla press, lightly dust both sides with a little rice flour, place one of the pieces into the center, press firmly. Afterward, gently remove and continue with the remaining sections. You can now jump to step 8 below.
If you don't have a tortilla press follow the next instructions...
* How to make homemade tortillas without a tortilla press
On a flat, dry surface place a sheet of parchment paper - lightly dust the paper with rice flour
Put one tortilla dough ball on top of the paper - lightly dust the dough with rice flour
Place a second sheet of parchment paper on top of the dough
Using a large wooden chopping board or wooden serving platter - press down on the dough ball with all your weight. In essence, you and the wooden board, have now become the tortilla press.
When you have it as flat as possible, remove the top layer of parchment paper. Dust the dough with a little more rice flour and return the paper on top.
Now continue to flatten the dough with a rolling pin. Roll from the center out, turning the dough often to help keep the circular shape. Generally, 1-2mm thick is ideal.
You are now ready to return to the recipe instructions.
8. Heat your non-stick pan to medium heat. Using a pastry brush lightly brush on a small amount of olive oil to one side of the tortilla. Place it oil side down into the hot pan. Allow to cook until light brown spots appear on the underside and small air bubbles form on the upper side. Brush on a little more olive oil to the upper side, then flip it over to continue cooking. (I like to prepare the next dough ball while the first one is cooking.)
9. When each tortilla is cooked stack it on a plate or cooling rack. The best way to stop them sticking to each other is to place a piece of parchment paper between each. This also makes it easier to separate them should you choose to freeze them for later use.
Once you are finished add your favorite Mexican fillings for a delicious meal. Or allow the cooked tortillas to cool completely and store for future use as described in the 'save for later' section below.
Notes
Save for later use - place sheets of parchment paper (baking or wax paper) between each tortilla to ensure they do not stick to each other. Store inside an airtight container and keep at room temperature for 1-2 days, in the fridge for 2-3 days or frozen in a freezer bag for the next time you want homemade tortillas.

Very good
Very good
Very good
Awesome
Very good
Very good